小程序常見的搜索功能如何實現呢?下面本篇文章就來一步步帶大家了解一下小程序中實現搜索功能的方法,希望對大家有所幫助!

在每個小程序開發的過程中,基本上都會配備有搜索功能,那么相對智能化的搜索功能是如何實現的呢,通過一段時間的學習,我已經學會比較全面的搜索框功能,來一起看看吧!

開發準備
- 微信小程序
- 有贊 vant 組件庫
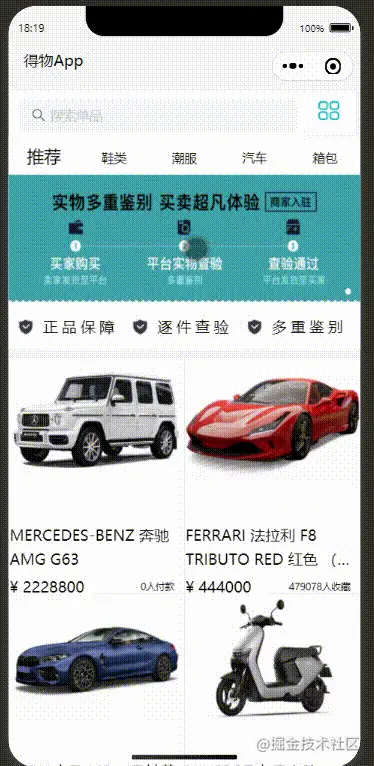
效果展示
先來看看效果
前期準備
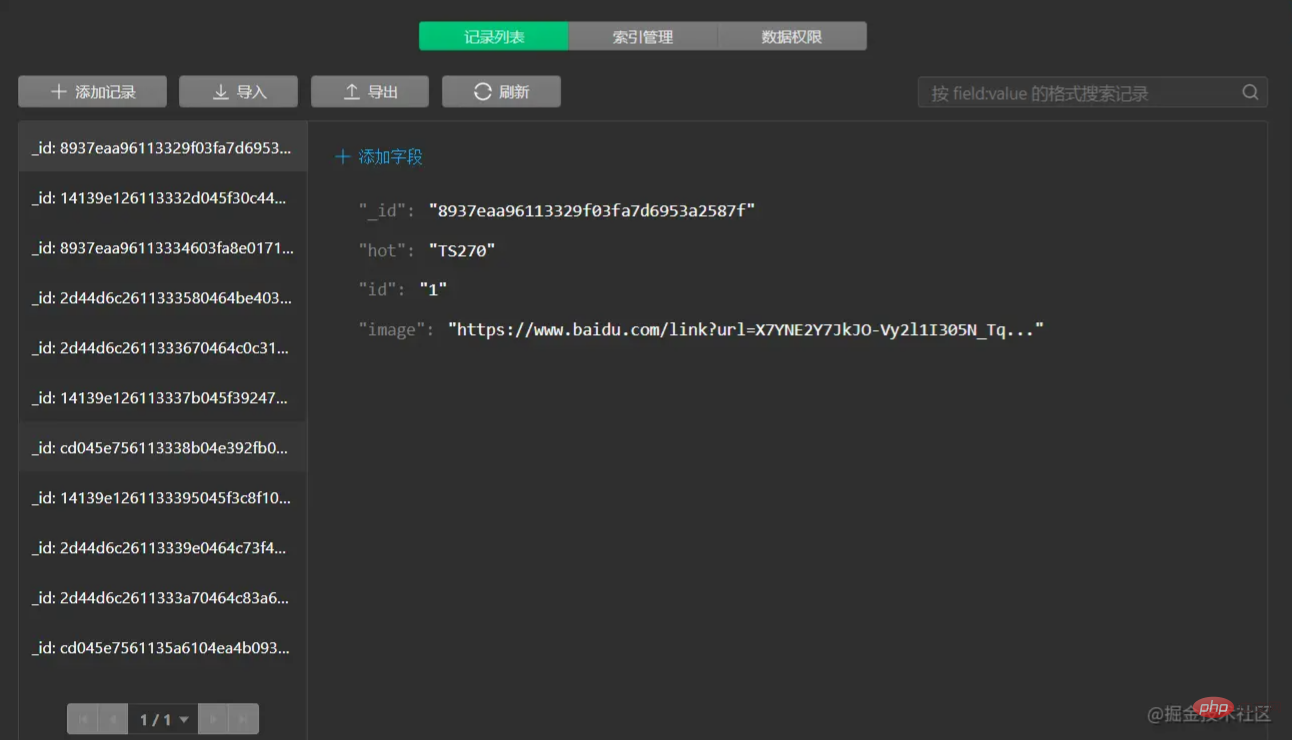
云數據庫導入一些數據用來測試搜索框功能
實現
在目錄下面新建三個pages
index用來作為搜索框的第一個頁面
search用來做具體搜索的頁面
hotsearch是搜索內容的詳情頁面
首先我們先來看看搜索框第一個頁面index的布局,這里主要介紹搜索框的內容,下面的其他內容就不在這兒贅述了
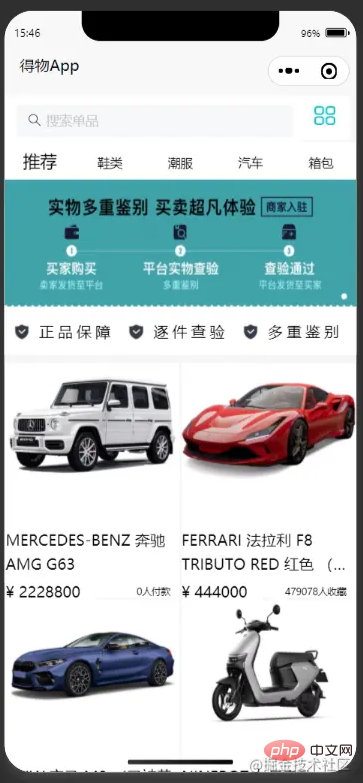
這是index.wxml代碼
<view class="search_1" bindtap="gotoSearch"> <van-search placeholder="搜索單品" disabled /> </view> <view class="search_2"> <view class="pic" bindtap="list" > <image src=""></image> </view> </view> </view>
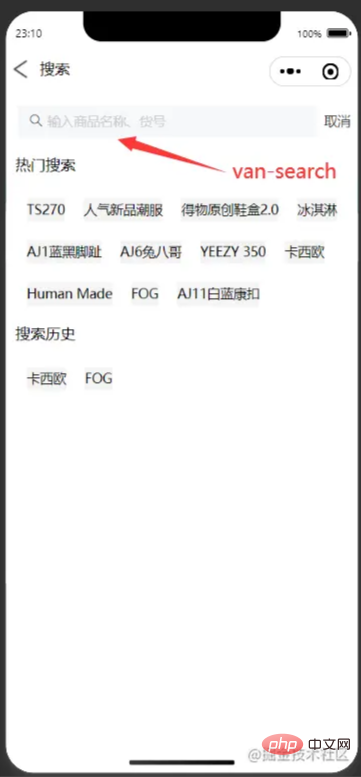
這是搜索框的search.wxml代碼
<view class="dewu-search"> <view class="return" > <view class="return_pic" bindtap="gotoindex"> <image src=""></image> </view> <view class="txt">搜索</view> </view> </view> <van-search value="{{value}}" show-action placeholder="輸入商品名稱、貨號" bind:clear="onClear" bind:search="onSearch" bind:cancel="oncancel" bind:change="onchange" bindtap="input" value="{{value}}" /> <block wx:if="results.length > 0"> <van-cell wx:for="{{results}}" wx:key="_id" title="{{item.title}}" size="large" /> </block> <view class="page1" hidden="{{issuggest==true?'hidden':''}}" > <view class="bd"> <view class="content">熱門搜索</view> <view class="box"> <view class="items"> <view class="item" wx:for="{{goods}}" wx:key="index" bindtap="hotsearch" data-id="{{item.id}}" > {{item.hot}} </view> </view> </view> </view> <view class="last"> <view class="content">搜索歷史</view> <view class="box"> <view class="items"> <view class="item" wx:for="{{historyList}}" wx:key="index" data-id="{{item.id}}" bindtap="gotohistoryList" wx:key="index"> {{item.hot}} </view> </view> </view> </view> </view> <view class="page2" hidden="{{issuggest==false?'hidden':''}}"> <view class="content1"> <view class="title" wx:for="{{goods1}}" data-id="{{item.id}}" wx:key="index" bindtap="hotsearch" > {{item.hot}} </view> </view> </view> </view>
js里面首先要引入云數據庫里的數據
const db = wx.cloud.database(); const dewuCollection = db.collection('dewu');
要做到輸入框發生改變時,彈出相關的內容,則需要兩個page,當輸入框有內容輸入時,把隱藏的頁面顯示出來hidden="{{issuggest==false?'hidden':''}}"來判斷是否要出現相關內容頁面, 用indexOf判斷e.detail(輸入框內容)是否是在云數據庫里存在的,如果是存在的,那么將這條數據存入一個數組里面,并且連接之前搜索后的數組,再使用 wx.setStorageSync();將輸入框的數據存入到storage里面,然后再wx.getStorageSync()提取數據。
這是當輸入框有數據的時候就會彈出詳情頁面,點擊可以跳轉到商品的詳情頁
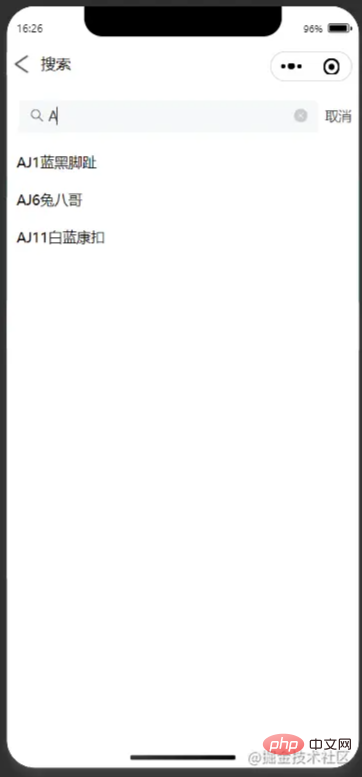
這是搜索框的邏輯
if(e.detail.length!=0){ this.setData({ issuggest:true, }) var arr = []; console.log(this.data.goods.length); for (var i = 0; i < this.data.goods.length; i++) { if (this.data.goods[i].hot.indexOf(e.detail)>=0) { arr.push(this.data.goods[i]); } this.setData({ goods1:arr, }) } } else { console.log('succes'); this.setData({ issuggest:false }) } }, async onSearch(e){ var arr1=new Array(); var historyList=new Array(); var storage=new Array(); for (let i = 0; i < this.data.goods.length; i++){ if(e.detail==this.data.goods[i].hot){ arr1.push(this.data.goods[i]); console.log(arr1); break } else{ arr1.push(e.detail); console.log(arr1); } } if(arr1.length>1){ this.setData({ storage:arr1.slice(arr1.length-1,arr1.length) }) } else{ console.log(arr1,'要存進去的數據'); this.setData({ storage:arr1 }) } if(this.data.historyList !=[]){ this.data.historyList = this.data.historyList.concat(this.data.storage);//連接 } else{ this.data.historyList=this.data.storage } wx.setStorageSync('historyList', this.data.historyList); this.setData({ historyList:this.data.historyList }) },

wx.navigateTo可以用來跳轉到詳細的頁面,加上字符串模板,判斷id的值,用數據來驅動頁面,跳轉到相同的頁面不同的數據。
wx.navigateTo({ url: `../hotsearch/hotsearch?id=`+id })
最后還要更新數據
wx.showLoading({ title: '數據加載中...', }) setTimeout(()=>{ wx.hideLoading() this.setData({ goodsNav: nav, goodsList:List, recommend:List, goods2:this.data.historyList }) },1000) // console.log(goodsList,'==========='); },
注意不要忘記要在全局json或者局部頁面json里引入需要使用的組件的地址
"usingComponents": { "van-search":"./miniprogram_npm/@vant/weapp/search/index" },
擴展
這個自動跳轉到導航欄中間的功能也是挺常用的
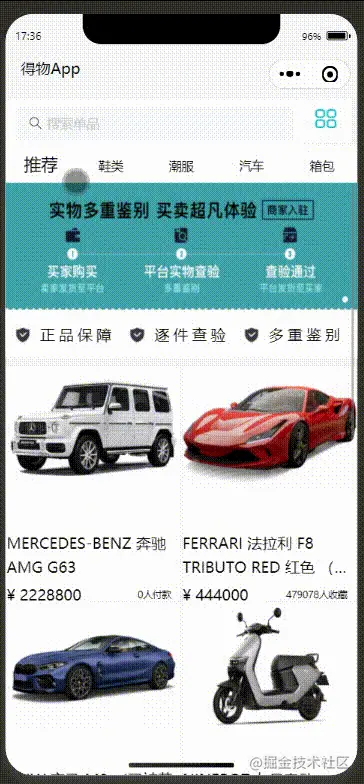
這是wxml代碼 最主要的是 scroll-x="true" 讓導航欄在水平方向可以滑動scroll-with-animation="true"是讓滑動產生動畫,scroll-into-view="{{scrollTop}}"
<scroll-view scroll-x="true" scroll-with-animation="true" style="width:100%;" class="scroll-view_H " scroll-into-view="{{scrollTop}}"> <view wx:for="{{goodsNav}}" wx:key="index" id="{{item.id}}" data-index="{{index}}" data-type="{{item.type}}" bindtap="changegoods" class="scroll-view-item_H {{activeNavIndex == index?'active': ''}} " > <text>{{item.text}}</text> </view> </scroll-view> </view>
這是綁定在導航欄上面的事件 let {index, type} = e.currentTarget.dataset;提取到 index 和 type ,然后設置一個count作為前幾個不動,然后拼接給id,把id的值傳給scrollTop,讓導航欄跳到scrollTop這個值,這個值就是在中間
console.log(e); let {index, type} = e.currentTarget.dataset; console.log("index=" +index, "type="+type); this.setData({ activeNavIndex:index }) if (type == 'recommend') { this.setData({ goodsList: this.data.recommend }) } else { let goods = this.data.recommend.filter((good) => good.camptype == type ) this.setData({ goodsList: goods }) //console.log(this.data.goods) } var index1 = e.currentTarget.dataset.index; var count = 2; var id = "item"+(index1-count);//拼接id if(count == 2 && index1 < 3 || count == 3 && index1 < 2 || count == 4 && index1 < 3){ id = "item0"; } console.log("下標",index1,"---分類id名稱",id) this.setData({ scrollTop: id }) },
這樣再加上wxss后就可以達到效果了 不過這樣的寫有一個問題,就是當顯示的內容為偶數時,如6,則不能正確的跳到正中間,會跳到3的位置,那樣就有一點兒偏差,這個問題我暫時還沒有解決,不知道有沒有大佬知道這個怎么解決呢?
源碼
這里有項目完整的源碼,上面給出的是部分代碼,如果有感興趣的可以去看看完整源碼
https://gitee.com/xinccc/fullstack_huoshan/tree/master/wxapp/dewu
總結
這是我第一次寫一次稍微完整的項目,這里主要介紹了我在開發過程中遇到的主要困難,雖然總體來說沒有什么難點,但是對我來說還是意義挺大的,有了一次這樣的經歷,讓我發現了我還有很多內容需要學習,也感謝在我有困難時幫我指點迷津的老師和同學,如果你感覺這篇文章有get到你的地方,不妨給我點個贊,這將為我莫大的鼓勵,各位大佬如果有什么指點的話,希望可以在評論區一起探討學習。
 站長資訊網
站長資訊網